Create a Support Ticket
Use a support ticket when you need help from the CloudMySite support team. A ticket keeps your request, replies, files, and updates in one place.
Before you start
Make sure you are signed in with the email address connected to your CloudMySite account.
To help support respond faster, prepare:
- The product or service related to the issue
- Product/order ID, if available
- A short subject
- A detailed description
- Screenshots or files, if helpful
Open the create ticket form
- Sign in to your CloudMySite account.
- Go to the Support Center.
- Select Create Ticket from the left menu.
- The create support request form will open.
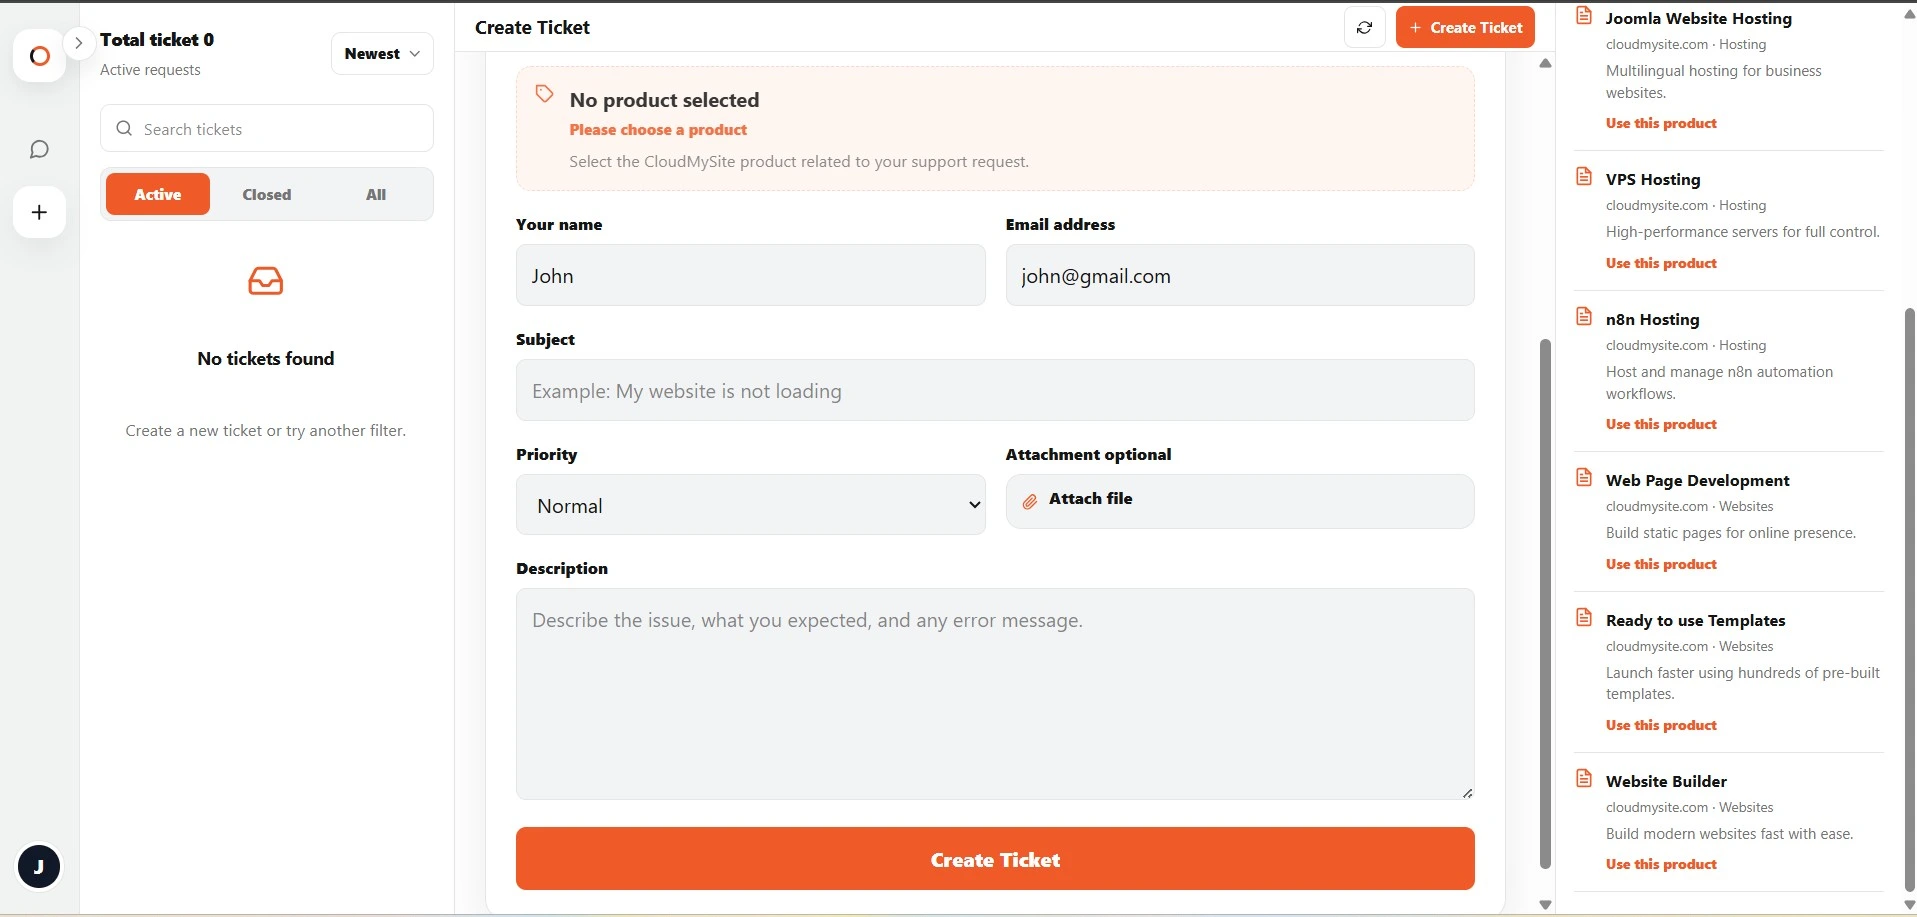
Choose a product
The Product dropdown tells CloudMySite what your request is about.
Select the product or service that best matches your issue.
Examples:
| Product area | Use it for |
|---|---|
| Hosting | Hosting questions, WordPress, Drupal, Joomla, or site availability. |
| Web pages | Static website or page development requests. |
| Bring Your Own Website | BYOW setup, migration, or update questions. |
| Form | Form setup, submission, or display issues. |
| Newsletter | Newsletter product or campaign-related questions. |
| Domain | Domain purchase, transfer, DNS, or verification. |
| Business email | Email setup or delivery questions. |
| VPS Hosting | VPS access or server-related questions. |
| AI | AI-related product questions. |
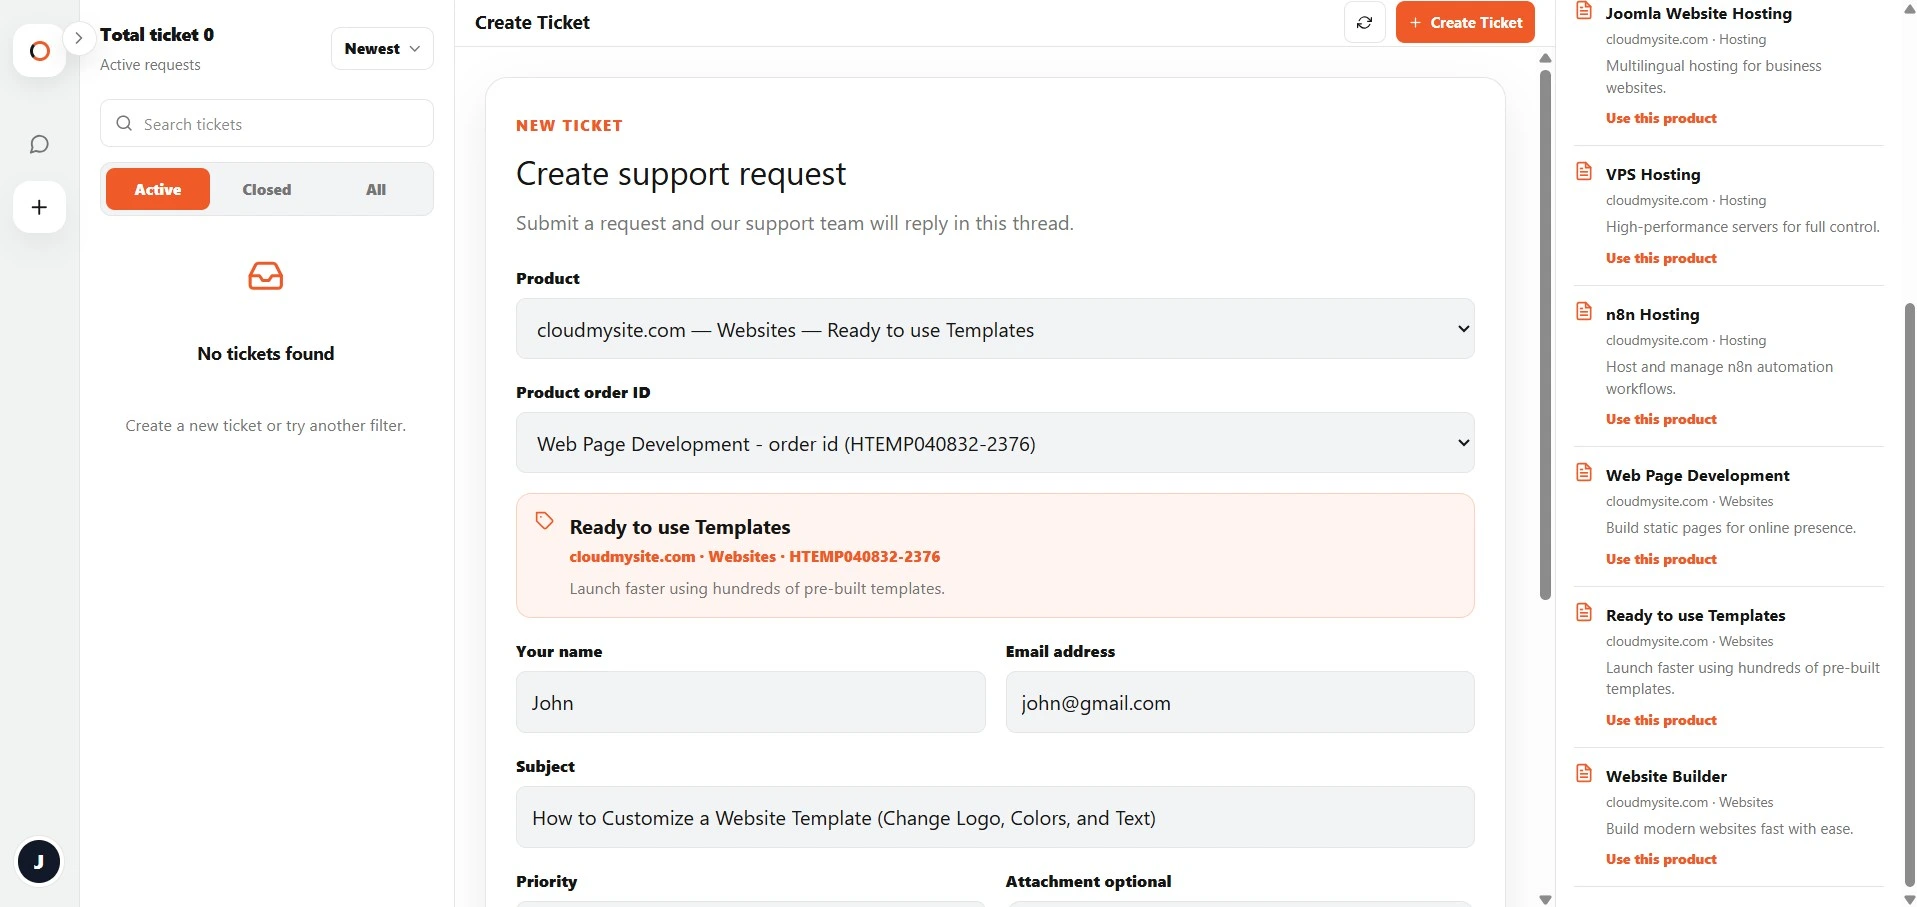
Select product/order ID
The Product order ID field is optional.
If the dropdown shows a matching order, select it. This helps support identify the exact purchase or product related to your request.
Examples of product/order options may look like:
Web Page Development - order id (12345)
Hosting - order id (67890)
Newsletter - order id (newsletter_abc123)
If you do not see a matching order ID, leave the field as Select product/order ID. You can still create the ticket.
Review the product card
After selecting a product, a product card appears under the dropdown.
It shows:
- Product name
- Product service and category
- Selected order ID, if selected
- Product description
Use this card to confirm that you selected the correct product before submitting the ticket.
Enter your name and email
The form may already show your name and email.
Check that both are correct.
Your support ticket and replies will be connected to this email address.
Write the subject
The subject should be short and specific.
Good examples:
Website is not loading
Domain transfer is pending
Newsletter campaign test email not received
WordPress admin login is not working
Need help connecting my domain
Avoid vague subjects like:
Help
Problem
Issue
Urgent
Choose priority
Select the priority that best matches the issue.
| Priority | Use it when |
|---|---|
| Low | General question or non-urgent request. |
| Normal | Standard support request. |
| High | Important issue affecting your site or service. |
| Urgent | Critical issue that needs fast attention. |
Use urgent only when the issue is truly time-sensitive.
Add an optional attachment
You can attach a file while creating a ticket.
Attachments are useful for:
- Screenshots
- Error messages
- PDFs
- Text files
- Word documents
- Images showing the issue
Supported file types include:
JPG, JPEG, PNG, WEBP, GIF, TXT, PDF, DOC, DOCX
If the file type is not supported, the form will ask you to choose another file.
Write the description
The description should clearly explain the problem.
Include:
- What you were trying to do
- What happened
- What you expected to happen
- When the issue started
- Any error message
- Page URL or domain, if relevant
- Steps to reproduce the issue
Example:
I am trying to connect my domain to my website, but the domain still shows the old page. I updated the DNS yesterday. The domain is example.com. Please check if anything else needs to be updated.
Submit the ticket
After completing the required fields:
- Review the selected product.
- Check the order ID if selected.
- Confirm your email address.
- Click Create Ticket.
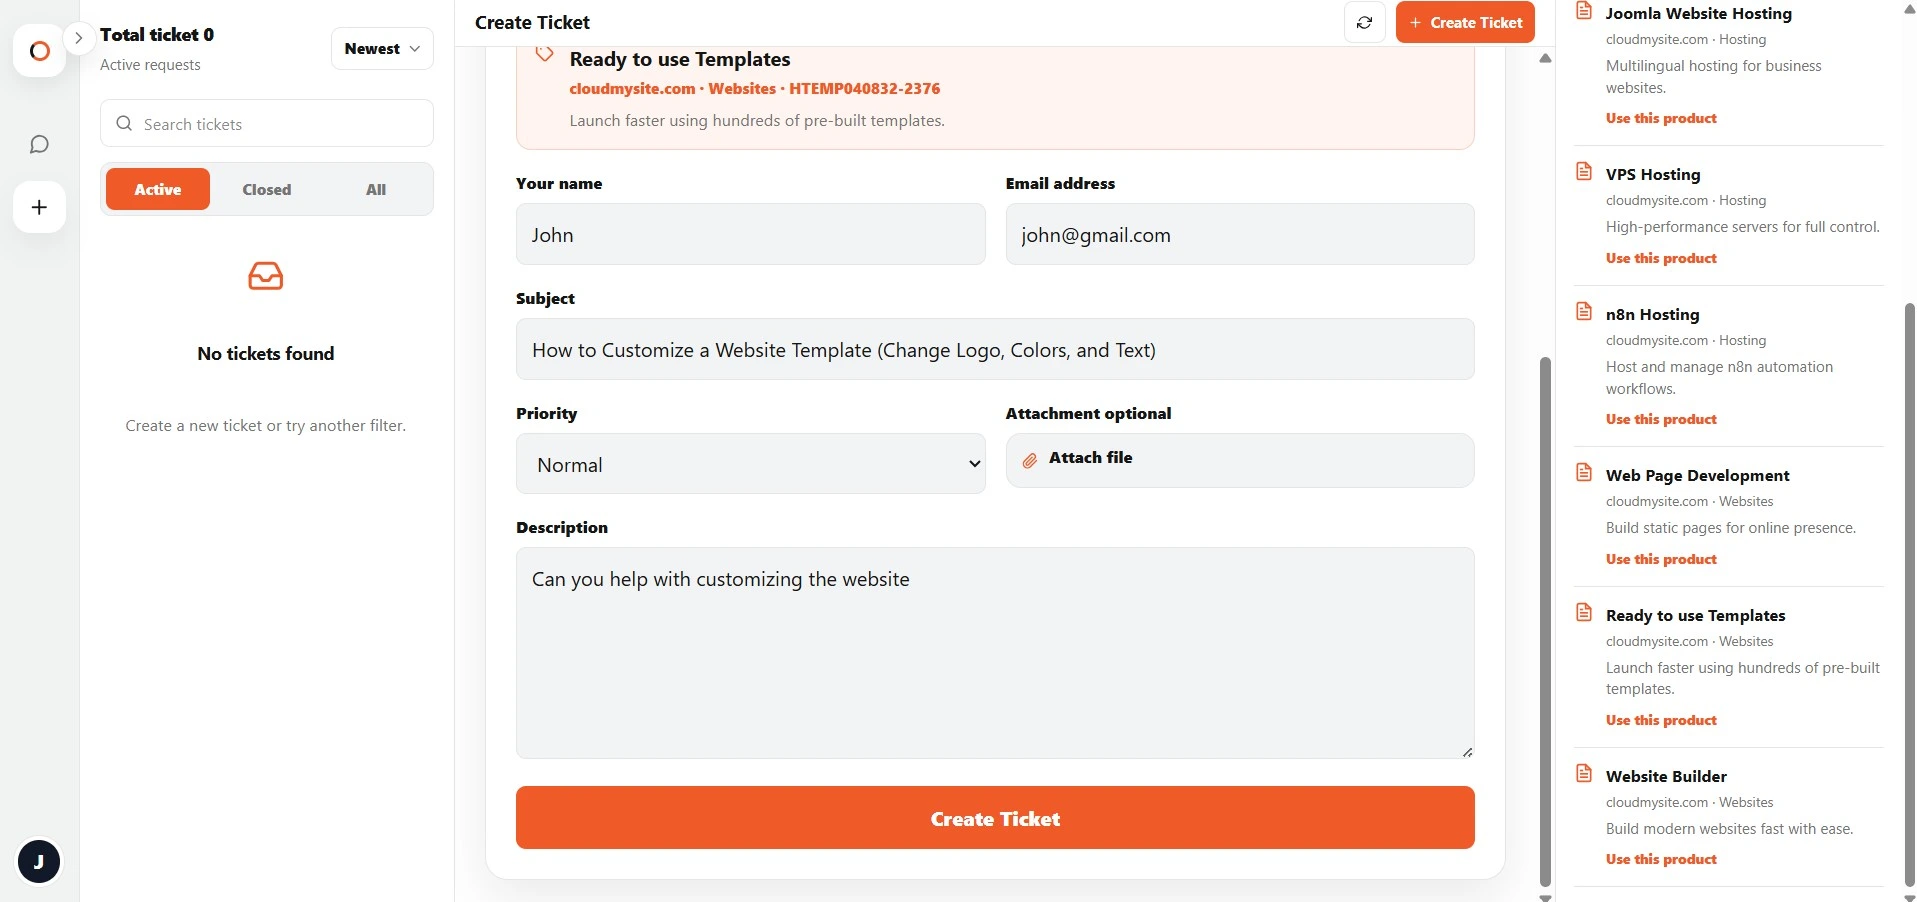
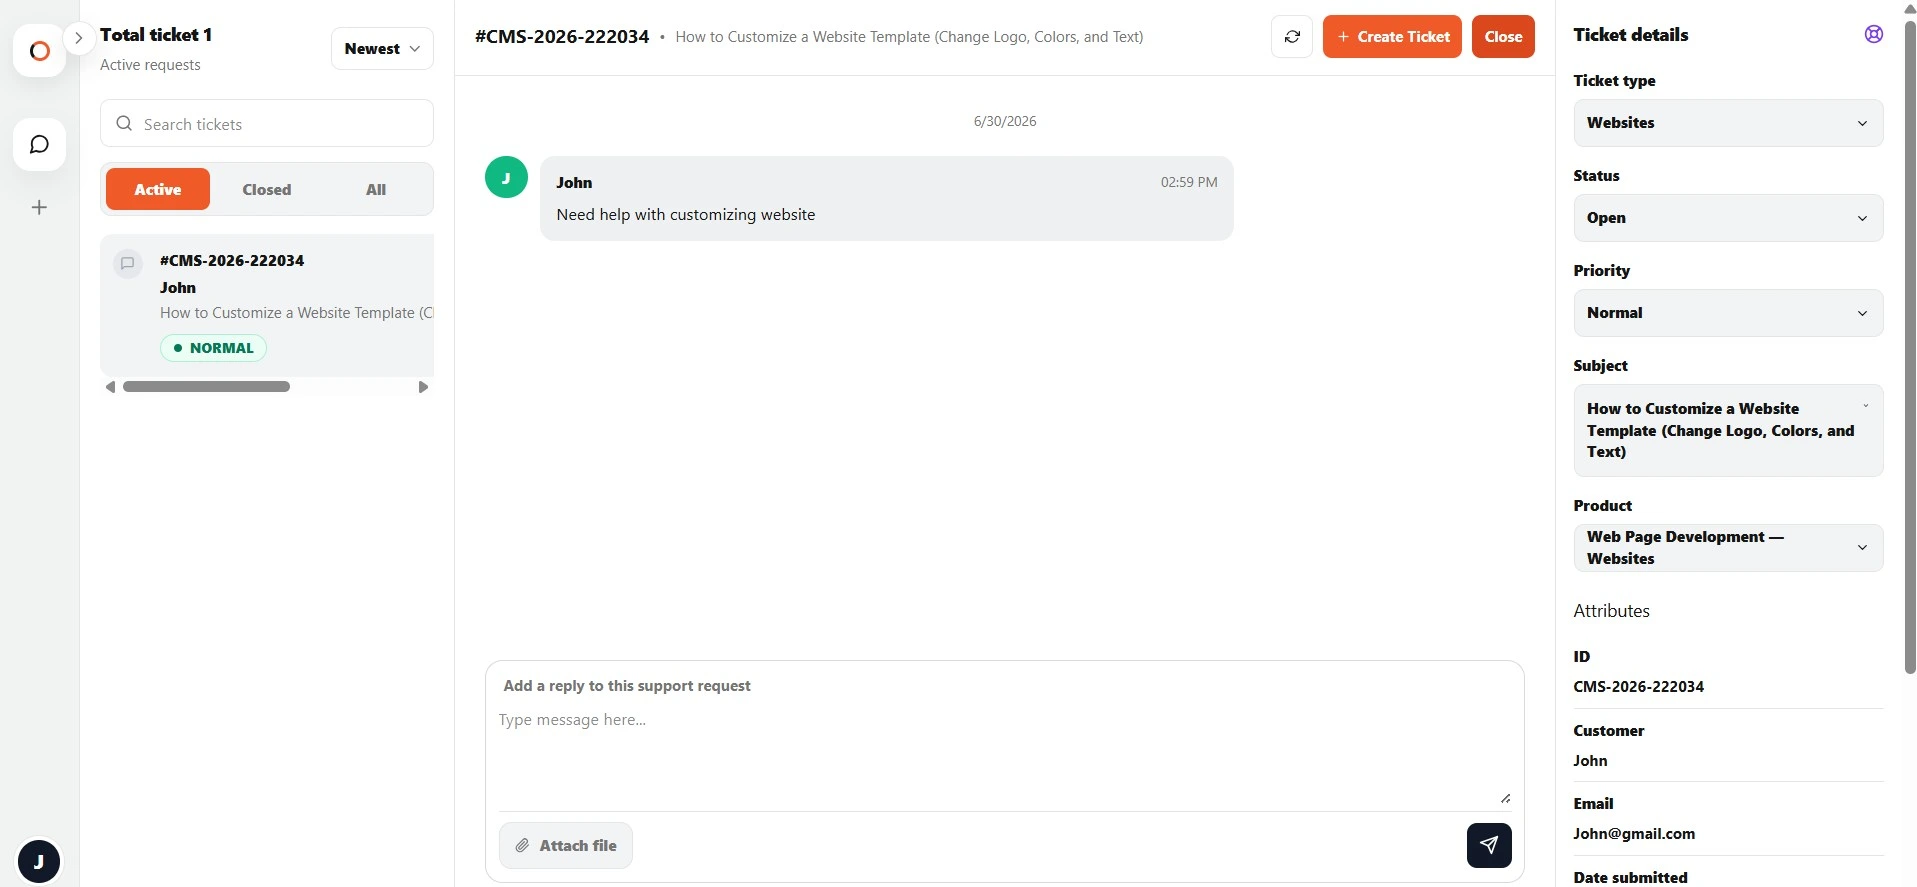
After the ticket is created, you will see a confirmation message and the ticket conversation will open.
What happens after submission
After you create a ticket:
- The ticket is saved in the Support Center.
- Your first message is added to the conversation.
- CloudMySite support is notified.
- You can reply in the same ticket.
- You can attach additional files later.
- The ticket appears in your ticket list.
If product/order ID is not selected
The order ID is optional. Your ticket will still be created if no order ID is selected.
Support may ask for more details later if they need to identify the exact product.